The journal is your in-play log of your game, it is designed to be used to quickly add notes on anything that happens during your game session for easy reference later.
Journal entries are time stamped with the real life date and time that they were created. This time can be edited so that you can add in missed entries afterwards. The journal lists entries in real-life date order.
It is designed so you can add entries as you play on the objects they are related to and read them back later either on the object or at chapter or campaign level (more on this later).
To add a journal entry, just type in the text box at the bottom of the journal and press enter (or click the add button). This will create an entry against the currently selected object, chapter or campaign.
You can also add journal entries to other objects from the context menu. Right-click the object you want to add an object to and select Add journal entry.
Every object can have journal entries associated with it so you will have to decide which one is the most appropriate place as an interaction with an NPC could feature the creature object, a location object, a quest object, etc. You will find what works best for you by playing around with options!
Campaign notes
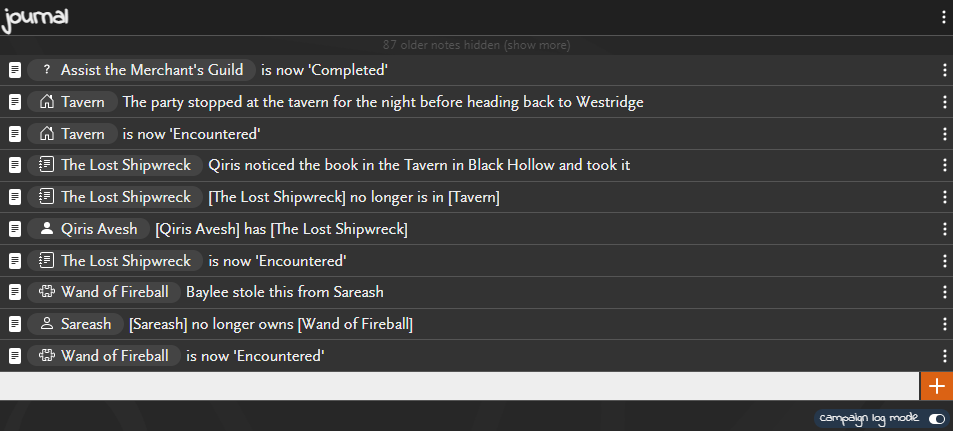
Journal entries on objects and chapters can be marked as a ‘campaign’ note which means that they become visible not only on the object that they are logged on but also on any chapters they are assigned to and the campaign itself. This is useful to be able to quickly see entries on all objects in order. You can toggle individual journal entries to be campaign or object level by clicking the icon, an outline icon (![]() ) is an object entry and a filled icon (
) is an object entry and a filled icon (![]() ) is a campaign entry. When the entry has come from another object, it will also have the object name and icon included, you can click this to open that object.
) is a campaign entry. When the entry has come from another object, it will also have the object name and icon included, you can click this to open that object.
Campaign log mode
Below the journal there is an option to toggle ‘campaign log mode’ on or off. It will be off by default but you can enable it just by clicking the button. There are two effects to campaign log mode:
- Changes to object status and connections will generate a journal entry against the relevant objects
- Object status is the bit above the note where you can set ‘not yet encountered’, ‘encountered’, etc. Changing this value when campaign log mode is enabled will add an journal entry to that object with the new status.
- When a new connection is created, a journal entry will be added to both connected objects to say the connection has been made. When a connection is deleted, a new journal entry will be added with this information.
- Journal entries against objects or chapters (including those added automatically from status or connection charges) will be set to be included in the campaign journal by default
Change the timestasmp of a journal entry
Journal entries are displayed in order of when they were created. If, for example, you needed to add a note from last session that you forgot about, you can add it in and change the time so it appears in the right place in the journal. Drag journal entries to move them before of after other entries, this will set the timestamp to a few seconds before or after the one it was dropped on to.
If you need to be more specific about the time or there isn’t an existing entry to drag it to, the set time button (![]() ) from the popout menu on the entry. This allows you to enter a specific time and date.
) from the popout menu on the entry. This allows you to enter a specific time and date.
Searching journal entries by date
You can expand the journal into full-screen mode by pressing the expand button () from the popput menu on the journal header.

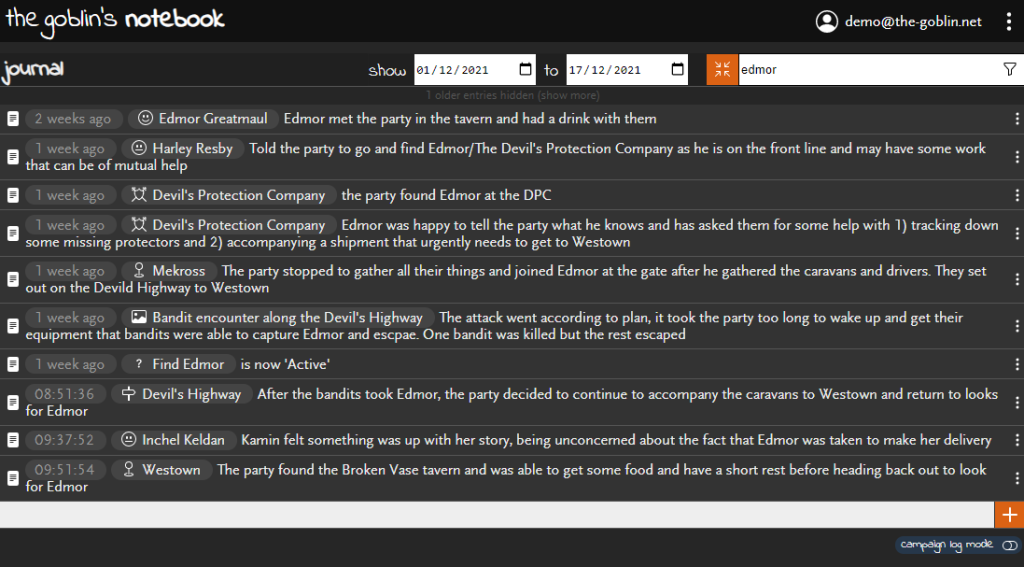
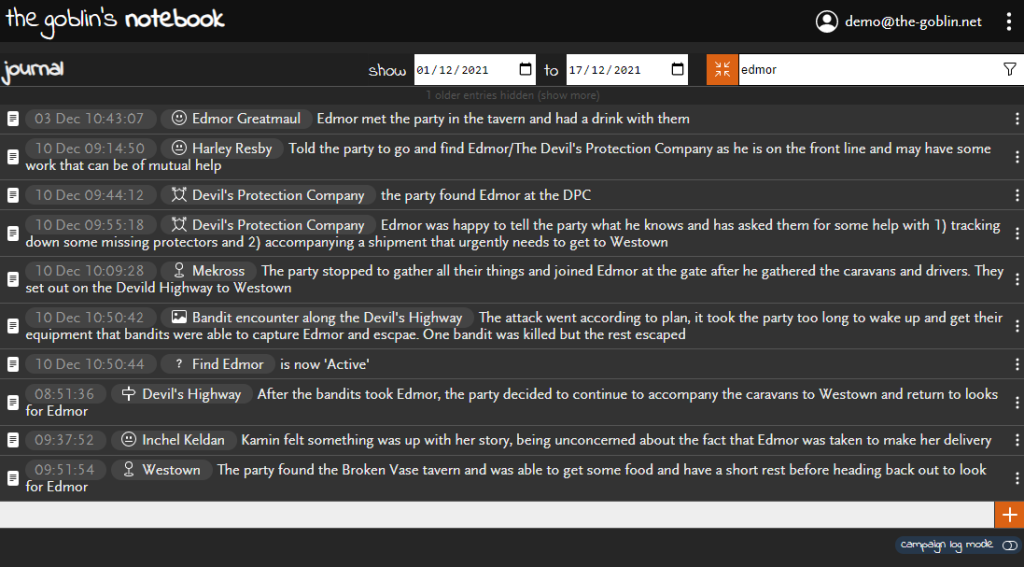
Click any timestamp to change between relative time (e.g. 1 week ago) to absolute time (e.g. 10 Dec 10:45:00). Relative time will show the following formats
- Within 24 hours, it will show the exact time the entry was posted e.g.
10:51:54 - Over 24 hours, within 7 days will show how many days ago the entry was posted e.g.
3 days ago - Over 7 days will show how many weeks ago the entry was posted e.g.
5 weeks
Click the restore button ( ) to return back to the normal notebook mode.